Hey everyone.
So at this months club meet we play a WWI game using Contemptible Littler Armies rules set. I provided a 3rd of the Germans and Peter provided the rest and all the Brits and French. I was in charge of the German left flank, in the trenches. Gareth provided 90% of the beautiful terrain and a few photos bellow where taken by him.
The scenario took place after the German failed push on Paris. The combined British and French force drove the Germans back. In an effort to halt the Allied advance the Germans dug in near a small French town. Think the river provided enough protection against an advance, the Germans build trenches to the side to prevent the Allies from bypassing the German held town. The Allies needed to get 2 units of half strength or greater off the German table edge to break through the German line and win.
Again the table looked amazing.
A view from the table from the Allied side before we set out figures.
Allied deployment zone. French on the left and Brits in Center and Right.
German left flank.
(following three photos taken by Gareth)
The route 'road' along the German right flank to the town.
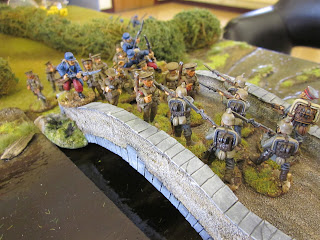
The bridge and main entrance into the town that would become the center of very bloody hand to hand fighting.
(Photo by Gareth looking from the bridge down the river)
The Germans had two forward observation units, one on each flank, plus 1 HMG and 4 units back in reserve (still on table). The reserve could not move forward until shooting started or the Commander saw the enemy and ordered them forward. We assumed the Allies would open up with an artillery barrage which would be the cue. To our dismay they waited till later meaning our reserve had to wait till our observation units started firing.
German left flank forward units and HMG.
(photo by Gareth)
German left flank reserve.
Right flank forward units.
Right flank reserve and command staff.
After the first two turns the British had advanced withing range of my HMG which shot (and missed) allowing our reserves to move up.
Reserves in the Trench.
Staff officer moved to higher ground to call in our defensive artillery.
Right flank moves to secure the bridge.
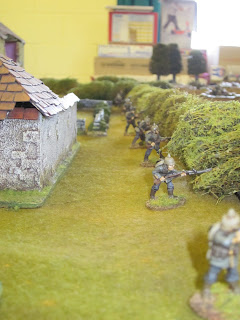
The French, moving in close order, advance quickly down the road.
German artillery manages to kill a few French as they move past the wall.
Reserves move further forward.
(photo by Gareth)
Allied artillery comes in at perfect timing to kill some of the Germans defending the bridge just as the French arrive.
It was at this point we realized that the Allies where going to bypass the trenches on the left and try to spear head across the bridge. The right flank reserve moved to help hold it.
Allies on the German left move in support of the bridge and not towards the trenches as suspected. (photo by Gareth)
Seeing the threat on the right flank the German commander and Staff Officer crossed the river at the ford to order the German left flank to move and assist the right.
The mass of Allies moving down the road.
(photo by Gareth)
The German right readies for the onslaught.
(photo by Gareth)
Under new orders the first unit of the German left starts moving.
One unit of French crosses the bridge and ferociously attacks the German unit in close combat. A German reserve unit then moved to black the path of the rest of the Allied force.
The French get the best of the close combat killing 4 of the 7 man unit to only 1 loss.
Eventually the French unit is cut down.
Reserves moving across the river.
The Germans on the bridge are charged by superior numbers of British and French but due to the bridges small width combat was stuck at 3 men across.
German reserves move to the ready, convinced their comrades on the bridge are about to be over run.
The German left front unit left the trenches to put pressure on the Allied flank
The Germans on the bridge managed to hold back the Allied assault on the bridge and the fighting slowed down, only 3 men able to fight on each side and the Germans holding their own. At his point 3 British units moved towards the ford, only other crossing point on their side.
Three German units from the left move to secure the crossing, annotated by the large rocks.
The three British and German units race for the crossing.
The Germans gun down the first unit.
At this point we where out of time and it was too close to call. The Allies still outnumbered the Germans on the bridge by a small number. The Germans at the ford also had a large force to contend with. It would have come down to a long drawn out hand to hand combat in which no side had a clear advantage. We called it a draw. Had a really good time and will definitely play the rules again.


2 comments:
Fantastic looking table, great AAR.
Fantastic pictures, a terrific game and a very brutal assault on the bridge. My favorite picture has to be the one with the British Infantry advancing through the fields (11th down) It just captures a moment from the early days of WW1.
Post a Comment